
The Hunter Ceiling Fan Manual PDF provides essential information for installing‚ operating‚ and maintaining your fan‚ ensuring safety‚ proper installation‚ and optimal performance for years to come.
1.1 Overview of the Manual
The Hunter Ceiling Fan Manual PDF is a comprehensive guide designed to assist users with the installation‚ operation‚ and maintenance of their ceiling fan. It includes detailed instructions for mounting options‚ electrical connections‚ and assembly of components. The manual also covers safety precautions‚ troubleshooting common issues‚ and tips for regular cleaning and lubrication. Additionally‚ it provides information on energy efficiency and eco-friendly features. This document is essential for ensuring proper installation‚ optimal performance‚ and longevity of the fan. Adhering to the guidelines in the manual ensures safety and maximizes the benefits of your Hunter ceiling fan.
1.2 Importance of Reading the Manual
Reading the Hunter Ceiling Fan Manual PDF is crucial for ensuring safe and proper installation‚ operation‚ and maintenance of your fan. It provides essential safety precautions‚ such as electrical guidelines and weight considerations‚ to prevent accidents. The manual also offers step-by-step installation instructions‚ helping you avoid common mistakes that could lead to improper mounting or performance issues. By following the manual‚ you can troubleshoot common problems‚ understand energy-efficient features‚ and extend the lifespan of your fan. Adhering to the manual ensures compliance with warranty terms and optimal functionality.

History of Hunter Fan Company
Founded in 1886‚ Hunter Fan Company pioneered the ceiling fan industry‚ revolutionizing home comfort with innovative designs and cutting-edge technology for over 135 years.
2.1 Founding and Evolution
Hunter Fan Company was founded in 1886‚ revolutionizing home comfort by inventing the first ceiling fan. Over 135 years‚ the company has evolved‚ maintaining its commitment to quality and innovation. From its early beginnings to modern designs‚ Hunter has consistently delivered durable and stylish ceiling fans. The company’s dedication to improving airflow and energy efficiency has solidified its reputation as a leader in the industry‚ offering timeless solutions for home and office spaces while adapting to changing design trends and technological advancements.
2.2 Innovations in Ceiling Fan Technology
Hunter Fan Company‚ founded in 1886‚ has been a pioneer in ceiling fan technology. Their groundbreaking innovations include the first ceiling fan‚ energy-efficient designs‚ and whisper-quiet operation. Features like Dust Armor nanotechnology minimize dust buildup‚ while reversible motors provide year-round comfort. With advanced controls such as remote operation and smart home integration‚ Hunter continues to lead the industry‚ offering both stylish and durable solutions that enhance home and office environments.

Pre-Installation Requirements
Before installation‚ ensure the location meets UL-approved safety codes and choose the right site for optimal airflow. Gather all necessary tools and materials as listed in the manual.
3.1 Choosing the Right Location for Your Fan
Selecting the right location for your Hunter ceiling fan is crucial for optimal airflow and safety. Ensure the fan is installed in a spot that meets UL-approved safety codes and avoids direct sunlight‚ which can cause uneven air distribution. The fan should be at least 7 feet above the floor and 12 inches from any walls to ensure proper circulation. For angled or vaulted ceilings‚ use the recommended mounting kits. Avoid installing in areas with high moisture or humidity to prevent damage and ensure longevity. Proper placement enhances both performance and safety.
3.2 Ensuring UL-Approved Safety Codes
UL-approved safety codes are essential for the safe installation and operation of your Hunter ceiling fan. Ensure the fan’s weight‚ up to 50 lbs‚ is supported by a sturdy ceiling bracket and electrical box rated for ceiling fans. Follow all local electrical codes and manufacturer guidelines to prevent hazards like fire or electrical shock. Proper mounting and secure connections are critical to ensure the fan operates safely and efficiently. Always verify that the installation meets UL standards to avoid potential risks and guarantee long-term reliability.
3.4 Tools and Materials Needed
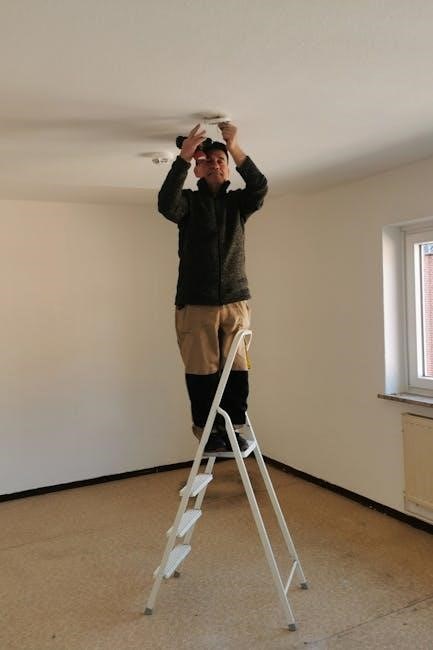
For a successful installation‚ gather the necessary tools and materials. You will need pliers‚ screwdrivers (both flat and Phillips)‚ wire connectors‚ and a drill with a 9/64 drill bit. A ladder or step stool is essential for reaching the ceiling. Ensure you have the provided hardware‚ including screws and downrod components. Additional materials like a Longer Downrod or Angled Mounting Kit may be required for high or slanted ceilings. Refer to the manual for specific tools based on your fan model and installation type to ensure all components are properly secured and functional.

Installation Guide
The installation guide provides step-by-step instructions for mounting‚ assembling‚ and wiring your Hunter ceiling fan. Ensure power is off‚ use appropriate mounting options‚ and follow the manual for a secure and proper setup.
4.1 Mounting Options
Hunter ceiling fans offer versatile mounting options to suit various ceiling types and heights. The standard mount is ideal for ceilings between 8-10 feet‚ while the low-profile mount is perfect for lower ceilings. For angled or vaulted ceilings‚ an angled mounting kit ensures secure installation. Each option requires specific tools and hardware‚ as outlined in the manual. Proper mounting ensures stability and safety‚ preventing potential risks like wobbling or fan damage. Always follow the manufacturer’s guidelines for your specific ceiling type to achieve a secure and balanced installation.
4.2 Step-by-Step Installation Process
The Hunter ceiling fan manual provides a detailed‚ step-by-step guide to ensure a smooth installation. Begin by preparing the necessary tools and ensuring the ceiling can support the fan’s weight. Install the mounting bracket securely‚ then assemble the fan components‚ including the downrod and blades. Carefully connect the electrical wires‚ matching the ground and power cables. Finally‚ secure the fan to the ceiling and test its operation. Always follow safety guidelines to avoid electrical hazards or improper mounting. Proper installation ensures optimal performance and longevity of your Hunter ceiling fan.
4.3 Electrical Connections
The manual provides clear instructions for safely connecting the fan’s electrical components. Ensure the power is turned off at the circuit breaker before starting. Match the ground wire to the grounding terminal and connect the black (power) and white (neutral) wires accordingly. Use wire connectors to secure all connections tightly. Refer to the wiring diagram in the manual for precise guidance. If unsure‚ consult a licensed electrician to avoid risks. Proper electrical connections are crucial for safe and reliable operation of your Hunter ceiling fan.
4.4 Assembling the Fan Components
Assembling your Hunter ceiling fan involves attaching the blades‚ securing the motor housing‚ and connecting the downrod. Start by unpacking all components and ensuring no parts are damaged. Attach the fan blades to the motor using the provided screws‚ tightening them firmly. Next‚ connect the downrod to the motor and canopy‚ ensuring it is securely fastened. For angled ceilings‚ use the included mounting kit. Follow the manual’s diagrams to align and attach components correctly. Avoid over-tightening‚ as this may damage the fan. Proper assembly ensures smooth operation and safety.
4.5 Securing the Fan to the Ceiling
To secure your Hunter ceiling fan‚ begin by positioning the canopy against the ceiling bracket‚ ensuring proper alignment. Insert the provided screws through the canopy and into the bracket‚ tightening them firmly but avoiding overtightening. For standard ceilings‚ use the included hardware to mount the fan directly. For angled or vaulted ceilings‚ attach the fan using the angled mounting kit‚ ensuring stability. Double-check all connections to prevent wobbling or instability. Follow the manual’s guidelines for torque specifications to ensure a safe and secure installation. Proper securing is crucial for optimal performance and safety.
Operating the Hunter Ceiling Fan
Operating your Hunter ceiling fan involves adjusting speed settings‚ using the remote control for convenient function management‚ and reversing the fan direction for seasonal efficiency. Ensure smooth operation by following the manual’s guidelines for optimal performance and energy savings. Proper usage enhances comfort and extends the fan’s lifespan. Always refer to the manual for specific operational instructions tailored to your fan model. This ensures seamless control over fan functions‚ including light dimming and speed adjustments‚ while maintaining energy efficiency. Regular checks and maintenance‚ as outlined‚ will keep your fan running smoothly year-round.
5.1 Understanding Fan Speed Controls
Understanding fan speed controls is crucial for optimizing your Hunter ceiling fan’s performance. Most models feature three to four speed settings‚ allowing you to adjust airflow according to your needs. The manual provides detailed instructions on how to operate these controls‚ whether using a wall switch‚ remote‚ or pull chain. Proper use of speed controls ensures energy efficiency and consistent comfort. Hunter fans often include innovative features like silent operation and programmable settings. By mastering the speed controls‚ you can enjoy a tailored experience‚ enhancing both comfort and energy savings in your home or office environment.
5.2 Using the Remote Control
The remote control for your Hunter ceiling fan offers convenient operation‚ allowing you to adjust fan speed‚ dim lights‚ and reverse the fan direction without leaving your seat. The manual provides step-by-step instructions for syncing the remote with your fan and troubleshooting common issues like weak signal strength or incorrect syncing. Ensure batteries are installed correctly and the remote is within range for optimal performance. Regularly cleaning the remote and checking battery life ensures reliable operation. Refer to the manual for specific remote functions and customization options tailored to your fan model.
5.3 Reversing the Fan Direction
Reversing your Hunter ceiling fan direction is a simple process that enhances year-round comfort. During summer‚ counterclockwise rotation maximizes cooling‚ while a clockwise setting in winter circulates warm air. To reverse‚ ensure the fan is turned off. Use the remote control or the switch on the fan housing‚ depending on your model. The manual provides clear instructions for this feature‚ ensuring smooth operation. Regular direction changes can improve energy efficiency and airflow distribution in your space. Always turn off the fan before reversing to avoid damage or noise.

Maintenance and Cleaning
Regular maintenance ensures optimal performance and longevity. Clean blades and housing with a soft cloth and mild detergent‚ avoiding abrasive cleaners. Dust Armor coating repels dust‚ simplifying upkeep.
6.1 Regular Cleaning Tips
Regular cleaning is essential to maintain your Hunter ceiling fan’s performance and appearance. Turn off the power before cleaning to ensure safety. Use a soft‚ dry cloth to wipe down the motor housing and blades‚ removing dust and debris. For tougher dirt‚ dampen the cloth with a mild detergent‚ but avoid harsh chemicals or abrasive cleaners that could damage finishes. Hunter’s Dust Armor nanotechnology repels dust‚ making upkeep easier. Clean light kits gently with a soft brush or cloth to prevent scratching. Regular maintenance ensures efficient airflow and longevity of your fan.
6.2 Lubricating Moving Parts
Regularly lubricating the moving parts of your Hunter ceiling fan ensures smooth operation and extends its lifespan. Use a silicone-based spray lubricant on the motor and bearings. Turn off the power and allow the fan to stop completely before applying lubricant. Avoid over-lubrication‚ as excess can attract dust. Gently wipe away any excess lubricant with a soft cloth to prevent drips. This maintenance step helps reduce friction and noise‚ keeping your fan running efficiently. Always follow the manufacturer’s recommendations for lubrication to maintain optimal performance and warranty validity.
6.3 Replacing Light Bulbs
Replacing light bulbs in your Hunter ceiling fan is a straightforward process. First‚ turn off the power to the fan at the electrical panel. Allow the bulbs to cool completely before handling. Remove the glass cover or globe by gently twisting and lifting it. Unscrew the old bulbs and replace them with new ones of the same wattage and type‚ as specified in the manual. Reattach the glass cover securely. Ensure all connections are tight to avoid vibration issues. Always use bulbs that meet the manufacturer’s recommendations to maintain safety and performance.

Troubleshooting Common Issues
Troubleshooting your Hunter ceiling fan involves checking electrical connections‚ ensuring proper installation‚ and consulting the manual for specific solutions to common problems like vibration or light malfunctions.
7.1 Fan Not Turning On
If your Hunter ceiling fan fails to turn on‚ first ensure the power source is active by checking the circuit breaker or fuse box. Verify that the wall switch and remote control are functioning correctly. Check for loose or damaged wiring connections‚ especially between the fan and the electrical outlet. Consult the manual for specific troubleshooting steps‚ such as resetting the remote control or ensuring the fan is properly connected to power. If issues persist‚ refer to the troubleshooting section for detailed diagnostic procedures to resolve the problem effectively.
7.2 Imbalanced Blades
If your Hunter ceiling fan exhibits wobbling or unusual noise‚ it may be due to imbalanced blades. To resolve this‚ ensure all blades are securely attached and evenly aligned. Clean the blades to remove dust or debris that could cause imbalance. Check for loose screws and tighten them firmly. If the issue persists‚ refer to the manual for balancing kits or professional assistance. Avoid bending blade brackets‚ as this can permanently damage the fan. Proper balancing ensures smooth operation and reduces noise‚ maintaining the fan’s efficiency and longevity.
7.3 Light Kit Malfunction
If your Hunter ceiling fan’s light kit is malfunctioning‚ ensure the light switch is functioning correctly and check for loose connections. Verify that bulbs are properly seated and replaced with the correct wattage specified in the manual. If issues persist‚ inspect the wiring for damage or corrosion. Consult the wiring diagram in the manual to ensure proper connections. For complex problems‚ contact Hunter’s customer support or a licensed electrician; Regular maintenance and correct installation are key to resolving light kit malfunctions and ensuring optimal performance.

Safety Precautions
Always turn off power before installation or maintenance. Use correct mounting hardware to avoid fan instability. Never overload the fan with excessive weight. Ensure all connections are secure to prevent electrical hazards and maintain safety standards for optimal performance.
8.1 Electrical Safety
Always disconnect power before installing or maintaining your Hunter ceiling fan to prevent electrical shock. Use only Hunter Solid State Speed Controls to ensure compatibility and safety. Avoid overloading circuits and ensure all wiring connections are secure and meet local electrical codes. Never touch electrical components with wet hands or while standing on a wet surface. Keep children away from installation areas and ensure all screws and fasteners are tightly secured. Follow the manual’s wiring diagram carefully to avoid short circuits or improper connections. Regularly inspect cords and plugs for damage. Use a mild detergent for cleaning to prevent damage to electrical components.
8.2 Weight and Mounting Safety
Your Hunter ceiling fan weighs up to 23 kg‚ requiring a secure mounting to prevent accidents. Use only approved mounting kits‚ especially for angled or vaulted ceilings. Ensure the ceiling bracket is tightly screwed into a sturdy support structure. Avoid bending blade brackets during installation or cleaning. Always follow torque specifications for screws to prevent loosening over time. Use the provided hardware and tools to ensure a stable installation. Double-check all connections before turning on the power. Regularly inspect the mounting hardware for signs of wear or loosening to maintain safety and performance.
8.3 Avoiding Fire Hazards
To prevent fire hazards‚ never exceed the maximum wattage specified in the light kit of your Hunter ceiling fan. Use only bulbs with the recommended wattage and type. Avoid covering the light kit with fabrics or materials that could trap heat. Ensure all electrical connections are secure and meet local safety codes. Do not modify or tamper with the fan’s internal components. Keep the fan away from flammable materials and avoid operating it near open flames or sparks. Regularly inspect for worn or damaged wiring and replace as needed.

Environmental Benefits
Hunter ceiling fans contribute to energy efficiency‚ reducing energy consumption and lowering utility bills. Their eco-friendly design helps minimize carbon footprint‚ promoting a sustainable living environment effortlessly.
9.1 Energy Efficiency
Hunter ceiling fans are designed with energy efficiency in mind‚ reducing energy consumption while maintaining optimal performance. By circulating air effectively‚ they lower cooling and heating demands‚ decreasing utility bills. Many models are ENERGY STAR certified‚ ensuring they meet strict energy-saving standards. Advanced motor technologies‚ such as DC motors‚ minimize power usage without compromising airflow. These eco-conscious features not only benefit the environment but also provide long-term cost savings for homeowners‚ making Hunter fans a sustainable and practical choice for any space.
9.2 Reducing Energy Consumption
Hunter ceiling fans are engineered to reduce energy consumption through innovative features like reversible operation and DC motor technology. These designs allow for efficient airflow with minimal power use. By circulating air effectively‚ fans reduce the need for high-energy heating and cooling systems. Additionally‚ smart controls and adjustable speed settings enable precise energy management. Hunter fans meet ENERGY STAR standards‚ ensuring they contribute to lower utility bills and a smaller environmental footprint‚ making them a cost-effective and eco-friendly solution for home comfort.
9.3 Eco-Friendly Features
Hunter ceiling fans incorporate eco-friendly features designed to minimize environmental impact. Energy-efficient DC motor technology reduces power consumption while maintaining high performance. Reversible operation allows year-round use‚ optimizing natural airflow and reducing reliance on heating and cooling systems. Many models are crafted with sustainable materials and finished with eco-conscious practices. Advanced features like Dust Armor nanotechnology reduce dust accumulation‚ lowering cleaning frequency and prolonging lifespan. These innovations ensure Hunter fans not only enhance comfort but also contribute to a greener‚ more sustainable living space‚ aligning with environmental values and ENERGY STAR certifications.
The Hunter Ceiling Fan Manual PDF is a comprehensive guide ensuring safe‚ efficient‚ and optimal fan operation. It underscores the fan’s durability‚ energy efficiency‚ and eco-friendly design‚ backed by Hunter’s commitment to quality and customer support.
10;1 Final Thoughts
10.2 Warranty and Customer Support
Hunter Fan Company offers a comprehensive warranty program‚ ensuring your ceiling fan is protected against defects in materials and workmanship. Customers can register their fan online for warranty verification and support. For any inquiries or issues‚ Hunter provides dedicated customer service via phone at 1-888-830-1326 or through their official website. The manual also guides users on troubleshooting common problems and accessing replacement parts. Hunter’s commitment to customer satisfaction is evident through their reliable support and extensive resources‚ ensuring a seamless experience for all users.