
This guide provides an overview of assembling Harper & Bright Designs furniture. It emphasizes the importance of reading all instructions carefully before starting. The goal is to ensure a safe and successful assembly process, utilizing provided high-quality hardware and clear directions.
Overview of Harper & Bright Designs Furniture
Harper & Bright Designs specializes in creating imaginative and functional furniture, particularly beds, designed to enhance both sleep and play. Their product range includes bunk beds, twin beds with bookcases, daybeds, and loft beds, all shipped ready-to-assemble. The furniture is crafted with a focus on durability and aesthetic appeal, often featuring a warm honey oak finish or a white wood design. These pieces are intended to be not only practical but also to add character to a space. Each item comes with clear, step-by-step assembly instructions and high-quality hardware, emphasizing a user-friendly assembly process. The company aims to provide furniture that is easy to assemble, using tools such as a Phillips-head screwdriver and often requiring two adults. The designs prioritize safety and structural integrity, ensuring that the furniture is both appealing and reliable. Customer service is available to assist with any assembly queries.

General Assembly Guidelines
Before beginning any assembly, it is crucial to thoroughly review all instructions. Follow the steps in order, and do not skip any. Ensure all screws are in place before tightening to avoid any safety hazards.
Importance of Reading Instructions Carefully
Prior to commencing any assembly of Harper & Bright Designs furniture, a thorough review of the provided instructions is absolutely essential. These instructions are meticulously crafted to guide you through each step of the process, ensuring a smooth and successful outcome. Failure to read these instructions carefully could result in incorrect assembly, potential damage to the product, and even pose safety risks. Each step is vital and skipping any can lead to instability or structural weaknesses. It is also important to identify all the parts and hardware to avoid any mistakes. The instruction manuals often include detailed diagrams and part lists which are critical for understanding how all components fit together. By thoroughly reading and understanding the instructions, you will be better equipped to assemble your furniture correctly, safely, and efficiently, leading to a satisfactory result. Remember, these manuals often contain important safety information, ensuring a secure setup. Therefore, taking the time to read and comprehend the instructions is a crucial first step in your assembly process.
Safety Precautions Before Assembly
Before you begin assembling any Harper & Bright Designs furniture, it’s imperative to prioritize safety. Always clear the assembly area of any obstacles, ensuring a flat, stable surface to work on, preferably a carpet or rug. Inspect all parts for any damage before proceeding. Gather all necessary tools, including the Allen wrench set and Phillips-head screwdriver, as outlined in the instructions, and have them readily available. Avoid standing on any of the furniture parts during assembly, as this could cause damage or injury. It is recommended that at least two adults participate in the assembly for better safety and handling of heavier parts. Remember to not tighten screws fully until all the parts are aligned appropriately. Take your time and do not force any components that do not fit together. If at any point, you have a doubt about the assembly process, consult the user manual or contact customer service. Following these safety precautions will prevent accidents and ensure a secure final product.
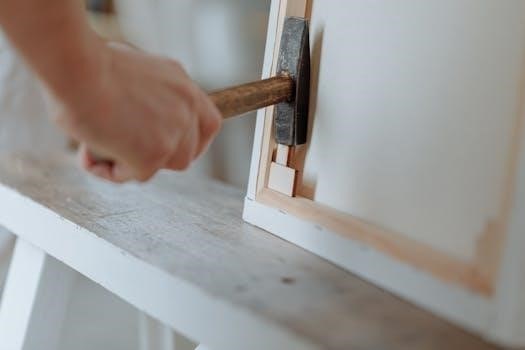
Hardware and Tools Required
To successfully assemble your Harper & Bright Designs furniture, having the correct hardware and tools readily available is essential. Typically, you will need a Phillips-head screwdriver to fasten most of the screws. Many Harper & Bright Designs products also require an Allen wrench set for specific bolts. Ensure you have the correct size Allen wrenches as indicated in your instruction manual. The hardware package will contain various screws, bolts, and dowels. It’s crucial to sort and identify these before you start assembling, referring to the parts list in the instruction manual. Some models may also include casters, knobs, and specialized bolts. Check that all necessary components are present before starting. Having a well-organized workspace with all these items will help streamline the assembly process and prevent interruptions. Make sure you have a clear understanding of each component and its use in the assembly. Always double-check before starting the assembly.

Specific Product Assembly
This section provides detailed assembly instructions for various Harper & Bright Designs products. These instructions will cover bunk beds, twin beds with bookcases, and daybeds, ensuring you can assemble your furniture correctly and safely by following each step.
Bunk Bed Assembly Instructions
Before beginning, carefully unpack all components and verify against the parts list. Start by assembling the bed frames, ensuring all screws are well-placed before fully tightening them. Follow the step-by-step instructions provided, paying close attention to the order of assembly. Do not skip any steps, as this can compromise the structural integrity of the bunk bed. Connect the side rails to the headboard and footboard, using the appropriate hardware. Be sure to use an Allen wrench set if required for certain connections. Ensure the ladder is securely attached according to the instructions. Proceed to install the bed slats, being careful not to lock the screws on the outer edges, leaving some space to prevent breakage. Finally, tighten up all screws to avoid any potential safety hazards. It’s recommended that two adults work together for the assembly, which should take approximately 1-2 hours.
Twin Bed with Bookcase Assembly
Begin by carefully unpacking all parts, referring to the provided parts list. Start by assembling the headboard, including the bookcase components. Attach the vertical bars to the back panel. Then, connect the side rails to the headboard and footboard, using the appropriate screws. Ensure all connections are snug, but do not fully tighten until the entire frame is assembled. Install the bed slats, taking care to leave a small space at the edges to prevent breakage, and ensure they are securely fastened. Attach the leg supports, making sure they are properly aligned with the frame. If your model includes trundle or drawers, assemble those separately and then integrate them into the main bed frame. Finally, tighten all screws and bolts, ensuring the bed is stable and secure. Always follow the provided instructions closely, and have two adults available to complete assembly, which usually takes 1-2 hours.
Daybed Assembly Instructions
Prior to assembly, lay out all parts and hardware on a clean, smooth surface, like a rug, to prevent scratches. Begin by attaching the side panels to the front and back panels, using the appropriate bolts. Ensure that all parts align correctly before fully tightening the hardware. Next, assemble the daybed’s support structure, including any legs or center supports, following the specific diagrams in the instructions. Attach the slats or base to support the mattress, making sure they are evenly spaced. If your daybed includes an upholstered component, take extra care to avoid damaging the fabric during assembly. Double check all screws and bolts, making sure they are tight, but not over-tightened, as this could damage the furniture. Finally, verify that the daybed is stable and safe for use, making any necessary adjustments. It is recommended to have two adults to assist with this process, which should be completed within 1-2 hours.

Troubleshooting and Support
This section addresses common assembly issues with Harper & Bright Designs furniture. It also provides customer service contact information for additional assistance. Should you encounter challenges, reach out via email or phone for support.
Common Assembly Issues
During the assembly of Harper & Bright Designs furniture, several common issues may arise. One frequent problem is misidentification of parts, leading to incorrect assembly steps. Always double-check the part list and diagrams before proceeding. Another common challenge is screws not aligning properly with pre-drilled holes. In such cases, ensure that all parts are correctly oriented and that no screws are tightened prematurely. It is also essential to gradually tighten screws rather than fully tightening them at once. This prevents misalignment and potential damage to the furniture. If you find any hardware missing or damaged, it is advised to contact customer support before continuing. Occasionally, customers may experience difficulty understanding certain instructions. In these situations, carefully review the diagrams and reach out to customer service for clarification or additional support. Remember that patience and attention to detail are vital when assembling furniture, so it is beneficial to take breaks and not rush through any of the steps. Furthermore, be sure to use the correct tools, as using the wrong tools may damage the furniture. If you are experiencing any problems that are not listed here, please contact customer service.
Customer Service Contact Information
For any questions, concerns, or issues encountered during the assembly of your Harper & Bright Designs furniture, our customer service team is ready to assist you. You can reach us via email at csr@harperbrightdesign.com, where we strive to respond as quickly as possible. Our dedicated support staff is also available by phone at 626-912-8886, extension number will vary based on department, if needed. Please have your product model number and order information available when contacting us for a more efficient resolution. We are committed to ensuring your satisfaction and will do our best to address any problems promptly and effectively. Our team can offer guidance on assembly challenges, troubleshoot technical issues, and provide information about missing or damaged parts. We also welcome any feedback you may have about our products or assembly instructions, as this helps us improve our services. We look forward to assisting you and making your assembly experience a successful one. Please note our contact hours are Monday through Friday, 9⁚00 AM to 5⁚00 PM Pacific Time, excluding holidays.